Installing your Voga Marine Full-Carbon Foil Box
Step-by-step guide to installing your carbon foil box
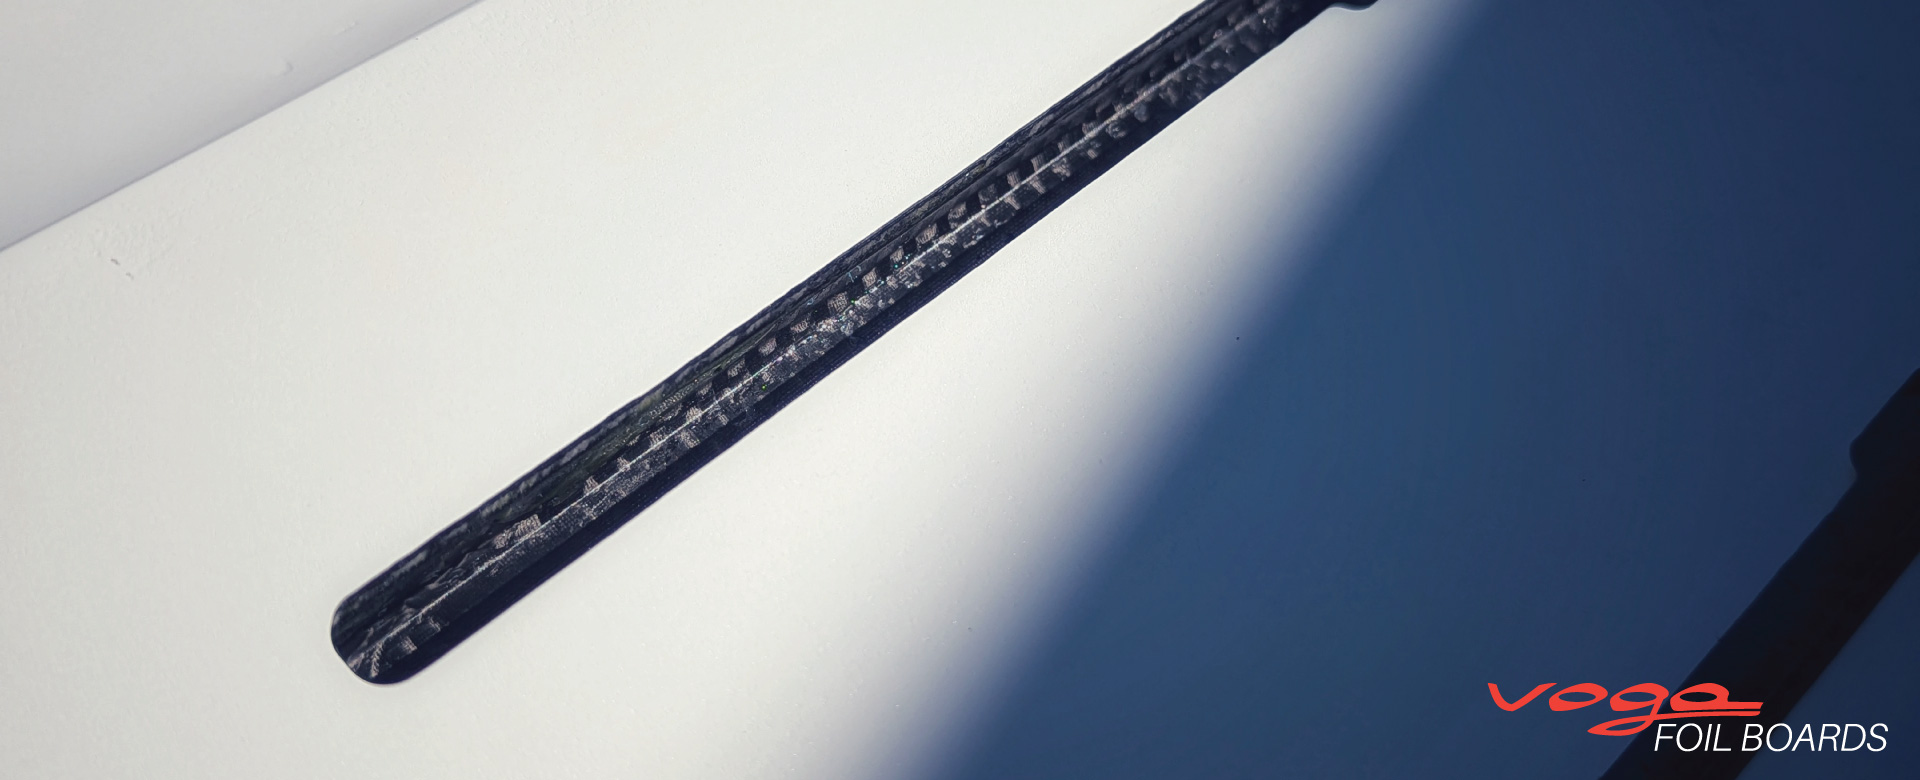
Congratulations and thank you for purchasing our full-carbon foil box, easier to install, lighter and stiffer than plastic rails.
Our system has been tested extensively through many iterations and has been proven to enhance performance of your board while withstanding intensive usage. When installed correctly, these will be suited for intense pumping, wave riding and extreme jumps.
Please do follow the following steps to ensure the durability of your board.
Important Disclaimer, Click Here to Read Before Starting
LEGAL DISCLAIMER AND SAFETY NOTICE
This Legal Disclaimer and Safety Notice (“Agreement”) is made between Voga Marine, referred to as "the Seller," and the Client, referred to as "the Client," concerning the purchase and installation of the foil box kit (“the Product”) intended to be placed in a foil board.
1. Return and Refund Policy
If the Client disagrees with any of the following clauses, the Client must immediately return the Product, unspoiled and in its original packaging, to the Seller for a refund.
2. Client Acknowledgement of Necessary Skills
The Client acknowledges that they possess the necessary skills, expertise, and experience to properly install the Product. The Seller is not responsible for improper installation performed by the Client.
3. Work Environment Compliance
The Client acknowledges that the installation of the Product will take place in a work environment that complies with all relevant health and safety regulations, including but not limited to the handling of composite materials.
4. Compatibility with Optimal Conditions
The Client is responsible for ensuring that the environment in which they install the Product is compatible with the optimal conditions specified in the technical sheet of the materials used. The Seller does not assume responsibility for the conditions in which the installation occurs.
5. Materials and Tools
The Seller provides only the Product. The Client acknowledges that it is the Client’s responsibility to ensure the compatibility and quality of any materials and tools used in the installation of the Product. The Seller does not warrant or assume responsibility for the Client’s choice of materials and tools.
6. Installation Safety
The Seller is not responsible for any injury that may occur during the installation process of the Product. The Client agrees to follow all safety procedures and use appropriate personal protective equipment (PPE) during installation.
7. Use and Liability
The Seller is not responsible for any damage, loss of equipment, injury, or death that may occur from the use of the Product. The Client agrees to use the Product responsibly, following all applicable guidelines and safety recommendations.
8. Product Warranty
The Product is covered by the French minimum legal warranty for consumer goods. The Client is entitled to a warranty of two years for any manufacturing defects. The warranty does not apply to damage resulting from improper installation, misuse, or modification of the Product.
9. Technical Support
Technical support is available to the Client by contacting the Seller directly. The Seller will provide guidance on installation procedures and general inquiries but is not responsible for the outcome of any installation work.
10. Governing Law and Jurisdiction
This Agreement is governed by French law. In case of any disputes, the jurisdiction will be the tribunal of Toulon, France.
11. Intellectual Property
The design of the Product, including any related patents, trademarks, or proprietary technology, is the intellectual property of the Seller. The Client agrees not to reproduce, copy, or reverse-engineer the Product or any part of its design.
12. Acknowledgement of Risks
The Client acknowledges that they understand the risks involved in the installation and use of the Product. These risks may include but are not limited to personal injury, equipment damage, and exposure to hazardous materials. The Client agrees to take all necessary precautions to ensure a safe installation and usage.
13. Changes to Terms
The Seller reserves the right to modify the terms and conditions of this Agreement at any time. It is the Client’s responsibility to review and be aware of any changes to the terms before proceeding with installation or use of the Product.
By accepting the Product, the Client agrees to the terms outlined in this Legal Disclaimer and Safety Notice.
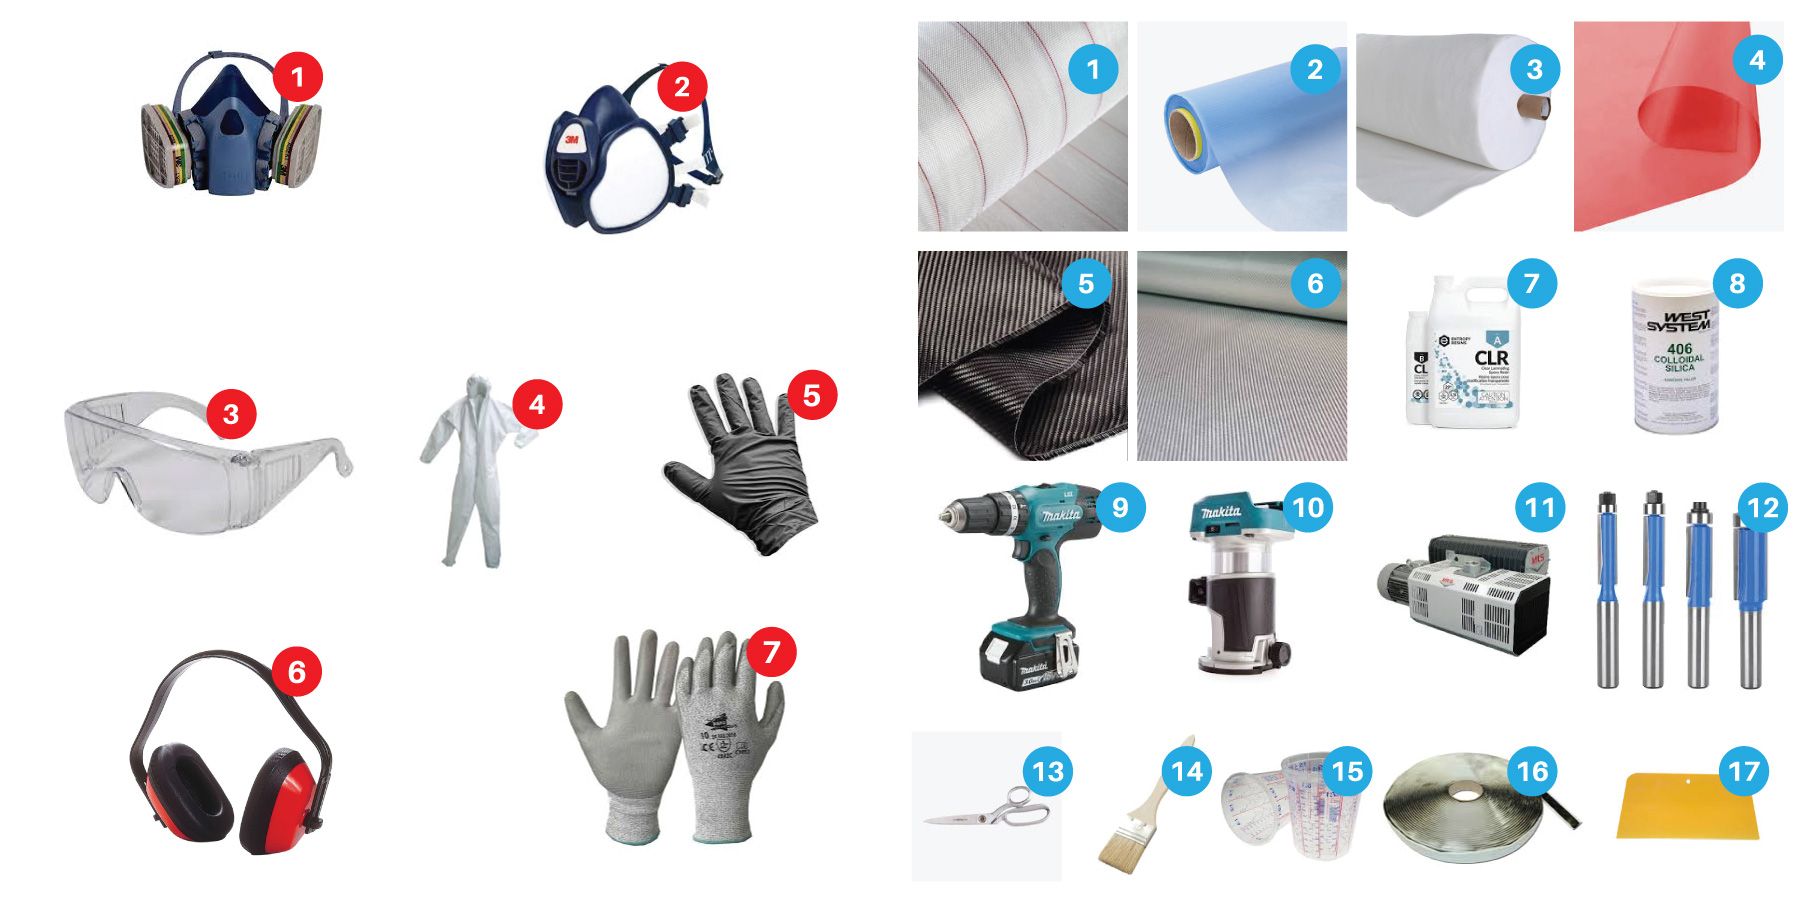
Mandatory Protective Equipment
Materials and Tooling
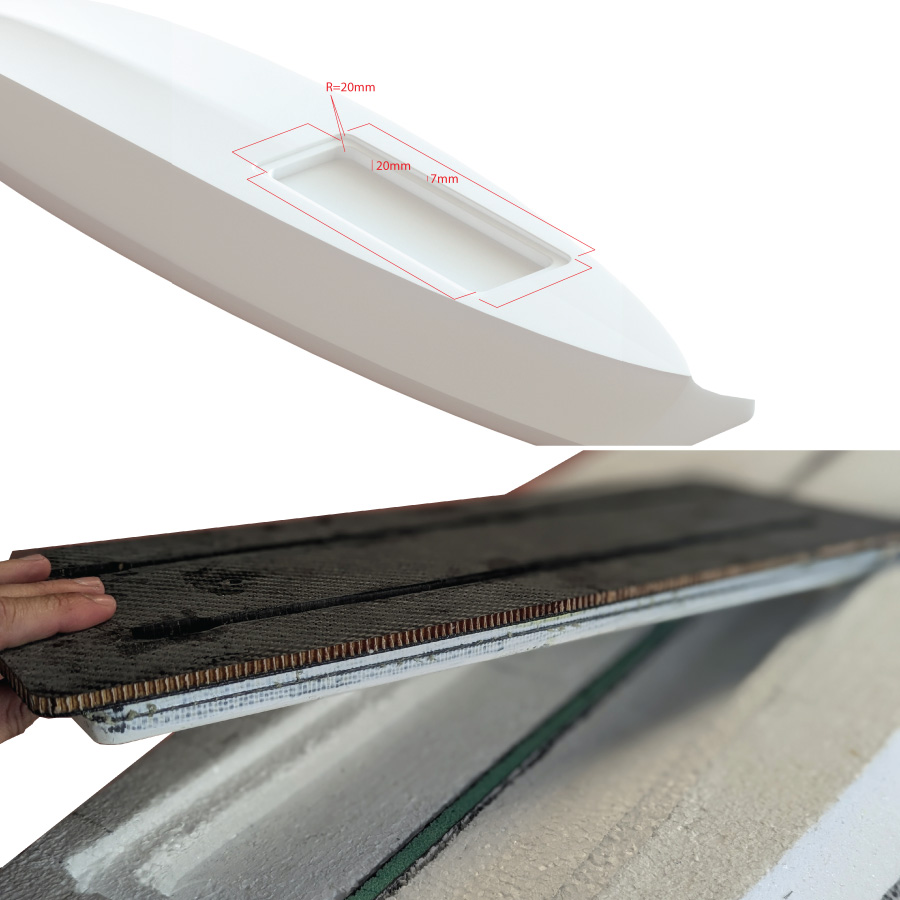
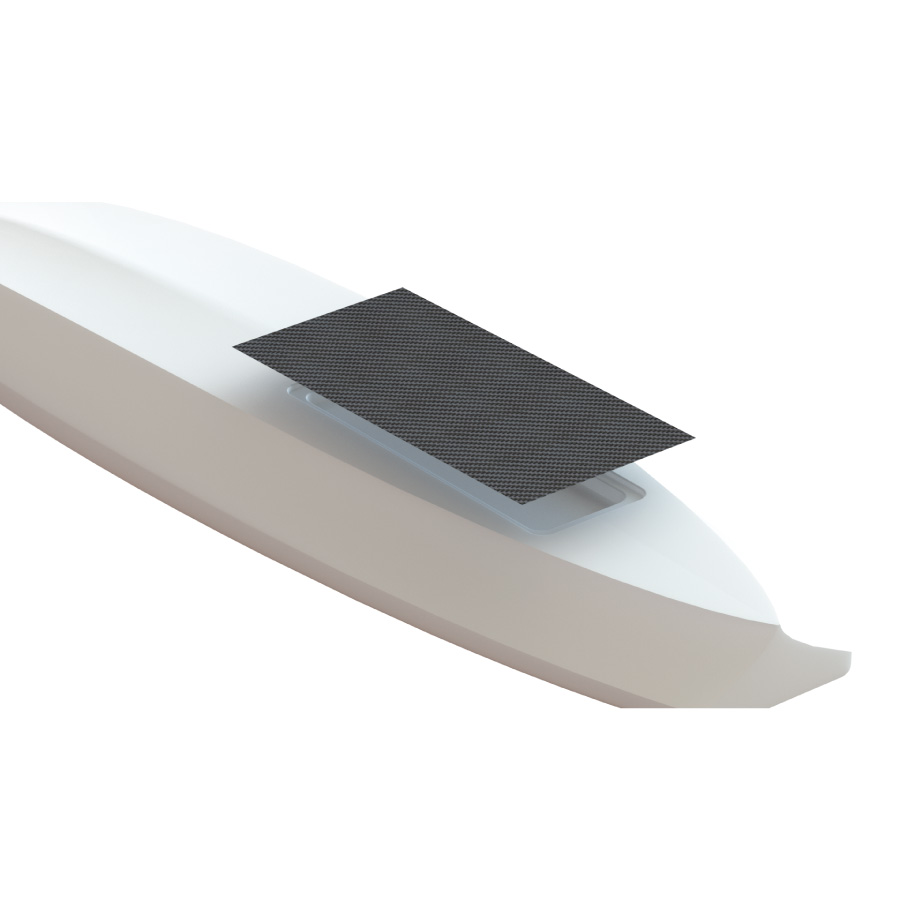
Step 1: Preparing your blank
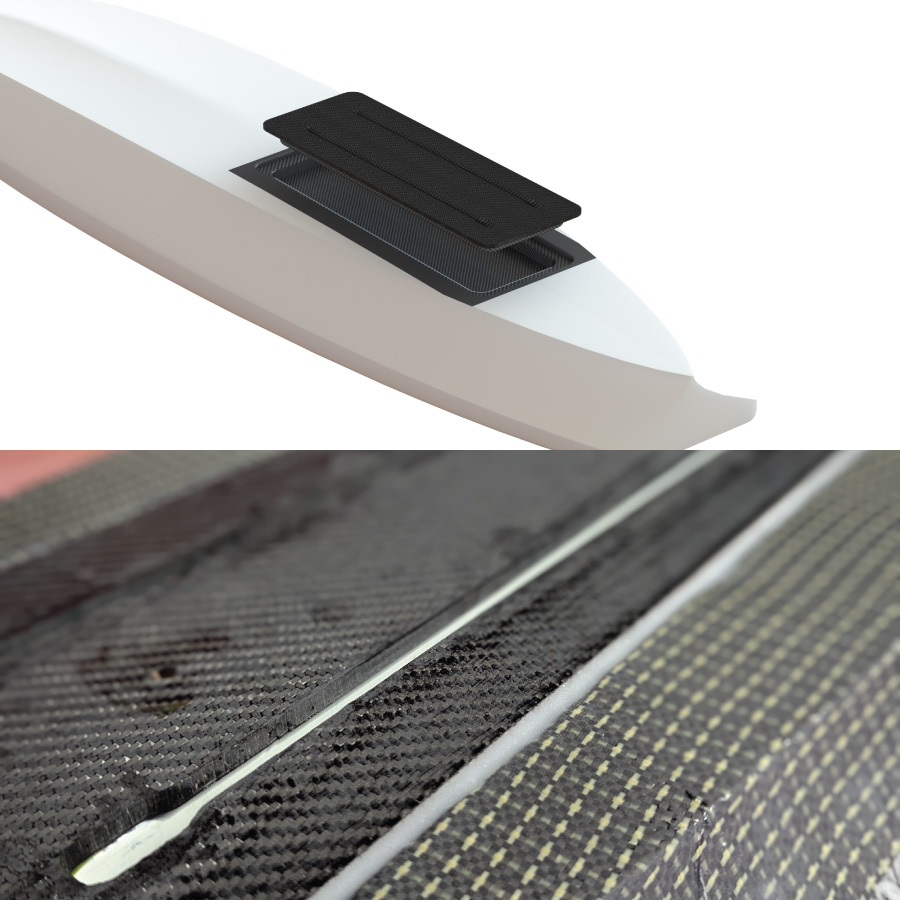
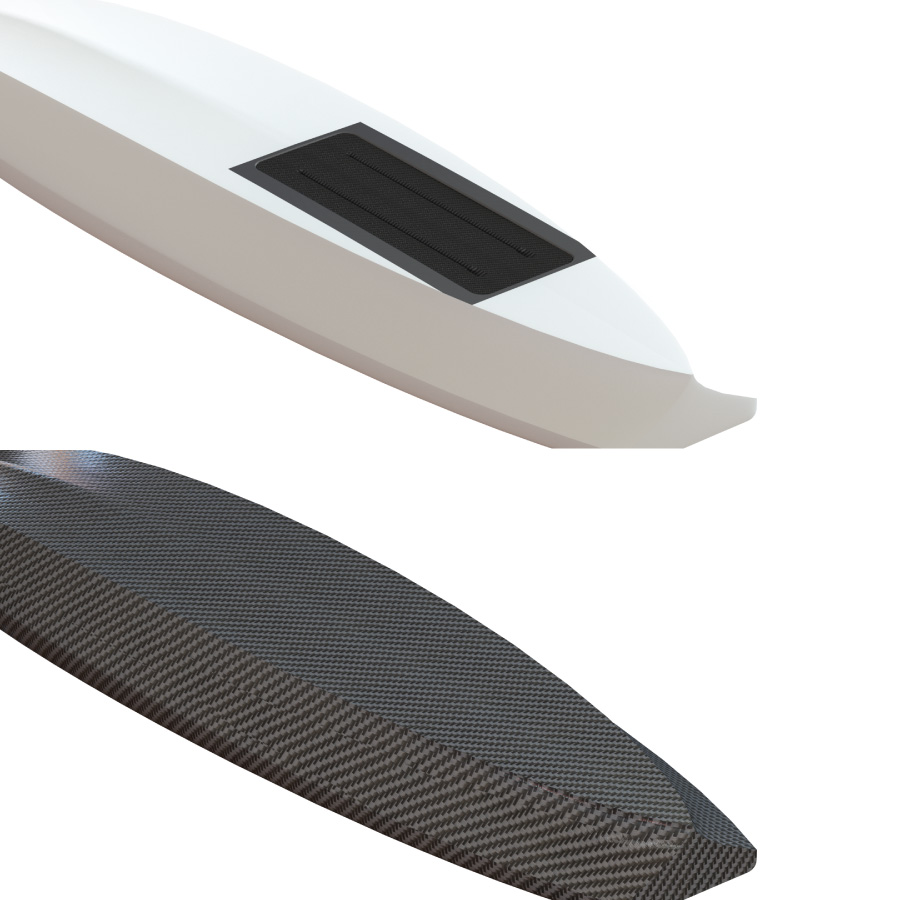
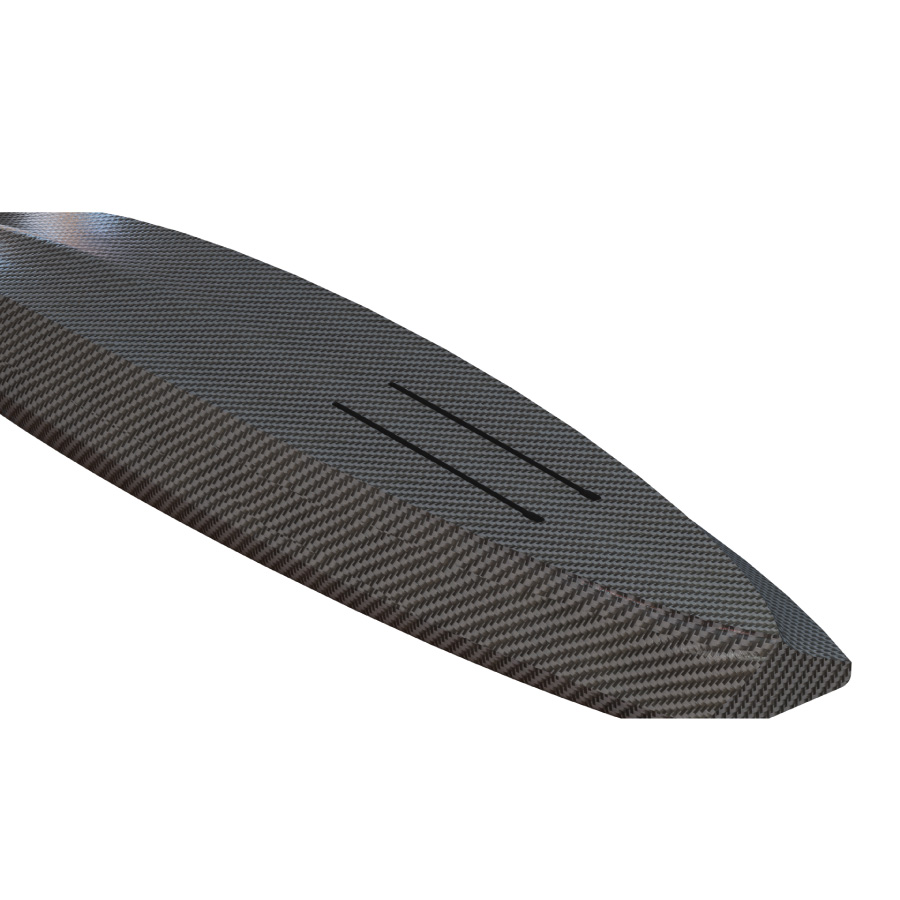
Your core must have a double recess with corresponding dimensions (refer to the dimensioned plan provided with your box).
Safety Equipment Required
![]()
- Position the box inside the recess to check. Be sure to verify that there is enough clearance to include your reinforcement fabric.
Step 2: Preparing reinforcement fabrics
It is essential to apply a lamination inside the box recess to reinforce the structure. Do not glue the box directly into your EPS core.
Safety Equipment Required
![]()
![]()
Materials and Tooling Required
![]()
- Cut your fabric in order to ensure an overlap of 10 cm around the box to facilitate the process and create a connection with the hull lamination.
Step 3: Preparing your foil box
Your box has been sanded to improve adhesion during installation. Warning, steps 3 and 4 must be executed simultaneously. Make sure to prepare both steps prior to mixing your resins.
Safety Equipment Required
![]()
![]()
![]()
![]()
Materials and Tooling Required
![]()
![]()
![]()
![]()
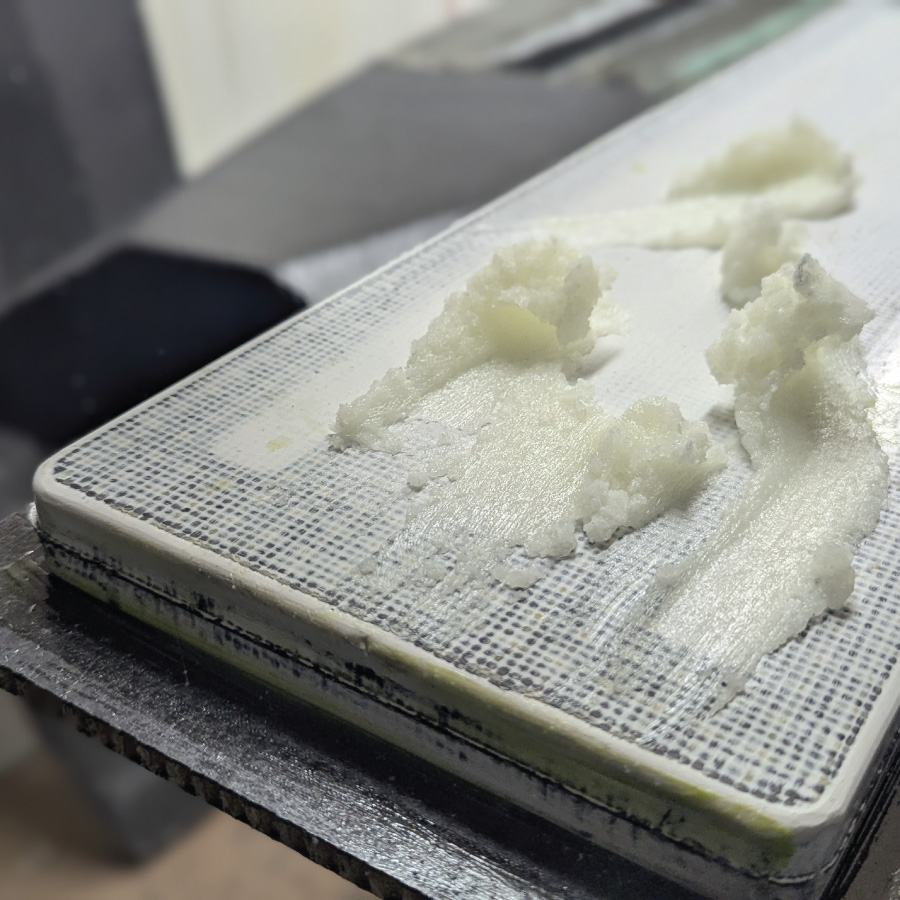
- Thoroughly degrease the bonding surfaces of the box using a degreasing agent.
- Apply a layer of silica-filled resin to all bonding surfaces of the box (bottom and side of box and carbon sandwich plate) to compensate for any gaps between the box and its support.
Step 4: Placement
We recommend applying resin to the fabrics flat on a tarp before positioning them in your board core. It is also advised to apply a thin layer of resin with a brush to the area of the core where the reinforcement fabrics are placed.
Safety Equipment Required
![]()
![]()
![]()
![]()
Materials and Tooling Required
![]()
![]()
![]()
![]()
![]() (or
(or ![]() )
)![]()
![]()
![]()
![]()
![]()
![]()
- Position your impregnated fabrics into the recess.
- Place the pre-coated box (step 3) firmly into the board.
- Create a fillet joint around the box using your remaining filled resin.
- Add your consumables: peel-ply, micro-perforated film, and breather fabric.
- Place the entire setup under vacuum at 250g of pressure.
Step 5: Laminating the hull
We recommend applying resin to the fabrics flat on a tarp before positioning them in your board core. It is also advised to apply a thin layer of resin with a brush to the area of the core where the reinforcement fabrics are placed.
Safety Equipment Required
![]()
![]()
![]()
![]()
Materials and Tooling Required
![]()
![]()
![]()
![]()
![]() (or
(or ![]() )
)![]()
![]()
![]()
![]()
![]()
![]()
- Pre-impregnate your fabric flat on a tarp, ensuring you scrape off any excess resin before placing it on the board. This step is best done with two people.
- Place your usual consumables: peel-ply, micro-perforated film, and PET breather fabric like Feltrex.
- Place the entire setup under vacuum at 250g of depression.
Step 6: Opening your rails
When your board is fully completed, the final step before hitting the water is to open your rails.
Safety Equipment Required
![]()
![]()
![]()
![]()
![]()
Materials and Tooling Required
![]()
![]()
![]()
- Drill a hole with a diameter larger than your copying router bit at the designated spot for inserting the T-nuts.
- Position your copying router bit in the hole so that the guide wheel contacts the edge of the rail before beginning your cut. The minimum radius of the rail cutout is 4mm, so it is designed for a router bit with a maximum diameter of 8mm.
- Route the opening by following the rail cutout.
Pay later with PayPal 4X
100% Secure Payment